Direct answer
Replacing a light fixture is a straightforward job for most ceiling and wall fixtures. The critical requirement is turning off the power at the breaker before touching any wiring, and confirming with a voltage tester that the power is actually off before handling wires. Done correctly the job takes 30 to 60 minutes and requires basic tools and no electrical experience beyond following the wire connections carefully.
What you need
A voltage tester (non-contact type), a flathead and Phillips screwdriver, wire connectors (usually included with the new fixture), electrical tape, a ladder tall enough to reach the fixture comfortably, and the replacement fixture. A helper to hold the fixture while you connect wires makes the job significantly easier, particularly for heavier ceiling fixtures.
Buy a voltage tester before starting if you don’t already have one. It costs around ten dollars and confirms the power is off before you touch any wiring. Working on a live wire is dangerous and this step cannot be skipped.
Turn off the power at the breaker
Go to the electrical panel and turn off the breaker that controls the circuit the fixture is on. If the breakers aren’t labeled, turn on the light, then flip breakers one at a time until the light goes off. Label that breaker before moving on.
Once the breaker is off, go back to the fixture and use the voltage tester to confirm no power is present. Hold the tester near the light switch and the fixture itself. If the tester beeps or lights up, the power is still on. Do not proceed until the tester confirms the circuit is dead.
Switch off the wall switch as well, though the breaker is the primary safety measure here. A wall switch cuts power to the fixture but does not make the wiring in the box safe to handle.
Remove the old fixture
Most ceiling fixtures are held up by a mounting bracket attached to the electrical box in the ceiling, with the fixture cover secured by screws or a decorative nut. Remove the screws or nut and lower the fixture carefully. Most fixtures have enough wire slack to let the fixture hang or rest on top of a ladder while you work on the connections.
Once the fixture is lowered, you’ll see the wires connecting it to the house wiring. There are typically three: a black wire (hot), a white wire (neutral), and a bare copper or green wire (ground). They’ll be joined with wire connectors, small plastic caps that twist on. Unscrew each connector and separate the wires. Keep track of which house wire is which as you disconnect them.
If the mounting bracket on the electrical box is old or doesn’t match the new fixture’s mounting hardware, replace it with the bracket included with the new fixture. Most modern fixtures come with a universal mounting bracket that fits standard electrical boxes.
Check the electrical box
Before installing the new fixture, check that the electrical box in the ceiling is rated for the weight of the new fixture. Standard electrical boxes are rated for fixtures up to 50 pounds. A heavier fixture requires a fan-rated box or a brace bar installed between ceiling joists. This is listed on the box itself or its packaging.
If the box feels loose or moves when you push on it, it needs to be secured or replaced before the new fixture goes up. A fixture mounted to a loose box is a safety hazard regardless of how well the wiring is done.
Install the new fixture
Attach the mounting bracket from the new fixture to the electrical box according to the instructions included with the fixture. Most brackets screw directly into the holes on the electrical box.
Connect the wires in the same configuration as the old fixture. Black to black, white to white, ground to ground. Twist each pair of wires together clockwise and secure with a wire connector twisted on in the same direction. Give each connection a firm tug to confirm it’s secure. A loose wire connection is the most common cause of a fixture that doesn’t work after installation.
Wrap each wire connector with a single layer of electrical tape as an added precaution, particularly if the connections feel crowded inside the box.
Tuck the wires carefully into the electrical box, fold them so they sit flat rather than bunched, and attach the fixture base to the mounting bracket. Install the bulbs, making sure the wattage doesn’t exceed the maximum listed on the fixture label.
Restore power and test
Turn the breaker back on and test the fixture with the wall switch. If it doesn’t light up, turn the breaker off again and check each wire connection. A fixture that flickers usually has a loose connection at one of the wire connectors. A fixture that doesn’t turn on at all is usually a missed connection or a bulb that isn’t seated properly.
If the breaker trips immediately when turned on, there is a wiring issue that needs to be addressed before proceeding. Turn the breaker off, recheck all connections for any bare wire touching the metal box or another wire it shouldn’t be contacting, and correct before restoring power.
Fixture types that follow a different process
Recessed lighting involves the same wiring principles but different mounting hardware. The fixture clips or twists into the housing already in the ceiling rather than mounting to a bracket.
Ceiling fans with lights are heavier and require a fan-rated electrical box. The wiring involves an additional wire in some cases for separate fan and light control. If the existing box is not fan-rated, the box needs to be replaced before the fan goes up.
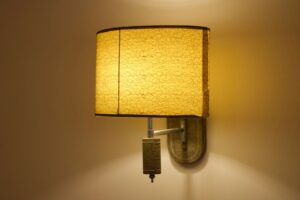
Vanity and wall sconces follow the same process as ceiling fixtures but are mounted to a wall box. The wiring is identical.
Fixtures controlled by a dimmer switch need to be compatible with the dimmer. LED fixtures in particular require a dimmer rated for LED loads. Check compatibility before purchasing the fixture.
When to call an electrician
Call an electrician if the wiring in the box doesn’t match the standard black, white, and ground configuration, if there are more wires in the box than expected and you’re unsure how they connect, if the breaker trips repeatedly after installation, or if the electrical box is damaged or corroded. These situations go beyond straightforward fixture replacement and need professional assessment.